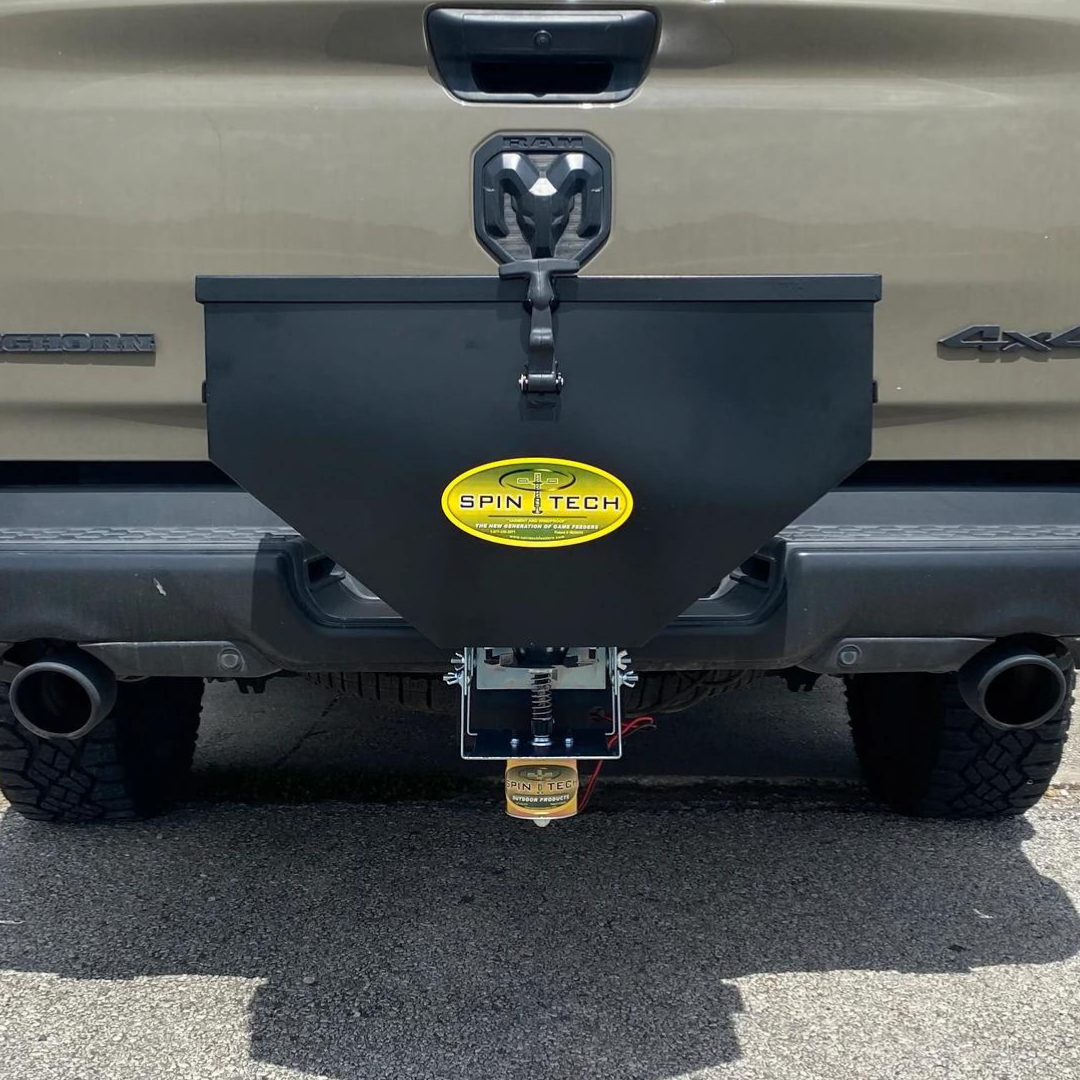
100LB Corrosion Resistant Spreader Owner's Manual
Introduction
The 100LB Corrosion Resistant Spreader is built for durability and versatility, handling seed, fertilizer, salt, feed, and more. This page provides essential setup, maintenance, and troubleshooting information to ensure optimal performance.
Sections:
Testing Your Spreader
Spreading Sand
Cleaning the Barrel & Bracketing
Storage
Installation Instructions
User Notes
Testing Your Spreader
When testing your spreader without material in the hopper, you may notice the spinner drops, then slowly rises and seals shut while still spinning. This is completely normal—your spreader requires material in the hopper to function properly.
Spreading Sand
This spreader is compatible with DRY sand only. Do not use wet sand. Sand should always be spread with the agitator installed.
Cleaning & Maintenance
Cleaning the Barrel & Bracketing
✔ Remove the spinner assembly by detaching 4 wingnuts.
✔ Rinse with water and Dawn dish soap.
✔ Fully dry before storage.
✔ Clean all brackets and mounting surfaces to ensure debris does not interfere with operation.
✔ For spinner mechanism cleaning, refer to the Spinner Mechanism Cleaning Guide.
Storage
✔ Store in a dry location.
✔ Clean & dry thoroughly before storage to prevent rust and corrosion.
Installation Instructions
Agitator Installation
Your spreader includes an agitator attachment. If spreading materials that tend to clump—such as sand or salt—you should install the agitator.
- DO NOT use the agitator when spreading seeds or fertilizer. Keeping the agitator off allows for finer control of your gap setting, ensuring precise spreading.
How to Install the Agitator
- Remove the three nuts located at the base of the three bolts on top of the spinner plate.
- Replace the original bolts with the agitator bolts (pictured in the manual).
- Pro Tip: If you have not yet assembled your spreader, the spinner plate will be exposed and unfastened, making it easier to install the agitator at this stage.
Parts List
- A. Vertical Hitch Bracket
- B. Horizontal Hitch Bracket
- C. Spinner Assembly
- D. Belly Support Band
- E. Barrel Lower Half
- F. Barrel Top Half
- G. Power/Control Cord
- H. Lid with Calibration Guide
- I. [OPTIONAL] Side Plates for Narrowing Spread Path
Hardware List
- 2x 7/8" Nut/Bolt/Washers
- 2x 3/4" Bolt/Washers
- 2x Long 1/2" Nut/Bolt/Washers
- 6x Short 1/2" Nut/Bolt/Washers
Required Tools
✔ Socket/Wrench Set (to correspond with hardware list)
✔ Large Channellock Pliers (highly recommended)
Step 1: Assemble the Barrel
- Place the top half of the barrel upside down (lid removed, sticker side facing you).
- Position the bottom half on top, aligning all bolt holes at the central seam. The flat square protrusion should face away from you.
- Insert 4 short 1/2" bolts into corresponding holes at the seam. These will slot in on one side, requiring no securing nut. Apply slight force if needed.
- Some minor bowing around the barrel seam is normal and will not cause leakage.
Step 2: Install the Spinner Assembly
- Remove the nuts and washers installed on the barrel bolts. Set them aside.
- Install the spinner assembly onto the protruding bolts. Hold the spinner assembly as shown to prevent the spinner mechanism from detaching when flipped upside down.
- Remove 4 wingnuts and washers from the spinner assembly bolts.
-
Lift and remove the top half of the spinner assembly, ensuring the mechanism does not fall off. If it does, reinstall in this order:
- Spring → Washer → Spinner Plate
- Fasten the mounting brackets to the hopper bolts with the 1/2" nuts and wingnuts removed earlier.
- Reattach the spinner assembly to the mounting brackets. Secure with the wingnuts, nuts, and bolts removed previously.
Step 3: Install the Hitch Brackets
- Install the vertical hitch bracket to the back of the barrel using 2 short 1/2" bolts, nuts, and washers. Secure from the inside of the hopper.
- Fasten 2x 3/4" bolts and washers into the vertical bracket's stabilizer holes.
- Tighten slowly to stabilize without damaging the barrel.
- Attach the belly band around the hopper. Adjust the band’s mounting surfaces with channellocks for proper alignment.
- Install the horizontal hitch bracket into the vertical bracket's slot. Secure with 7/8" bolts, washers, and nuts.
Step 4: Optional Steps
- Attach the spread narrowing plates using the wingnuts adjusted in previous steps.
- Calibration Guide is available inside the feeder lid.
Need Help?
📧 info@spintechspreaders.com
☎ 210-408-8019