Inverted SpinTech System Installation & Maintenance Guide
Sections:
Step by Step Installation
- motor installation
- replacing only the inverted spinner mechanism
- spinner installation & set screw access
How to Clean Your Inverted SpinTech Spinner Mechanism
Inverted Spinner Mechanism Troubleshooting Guide
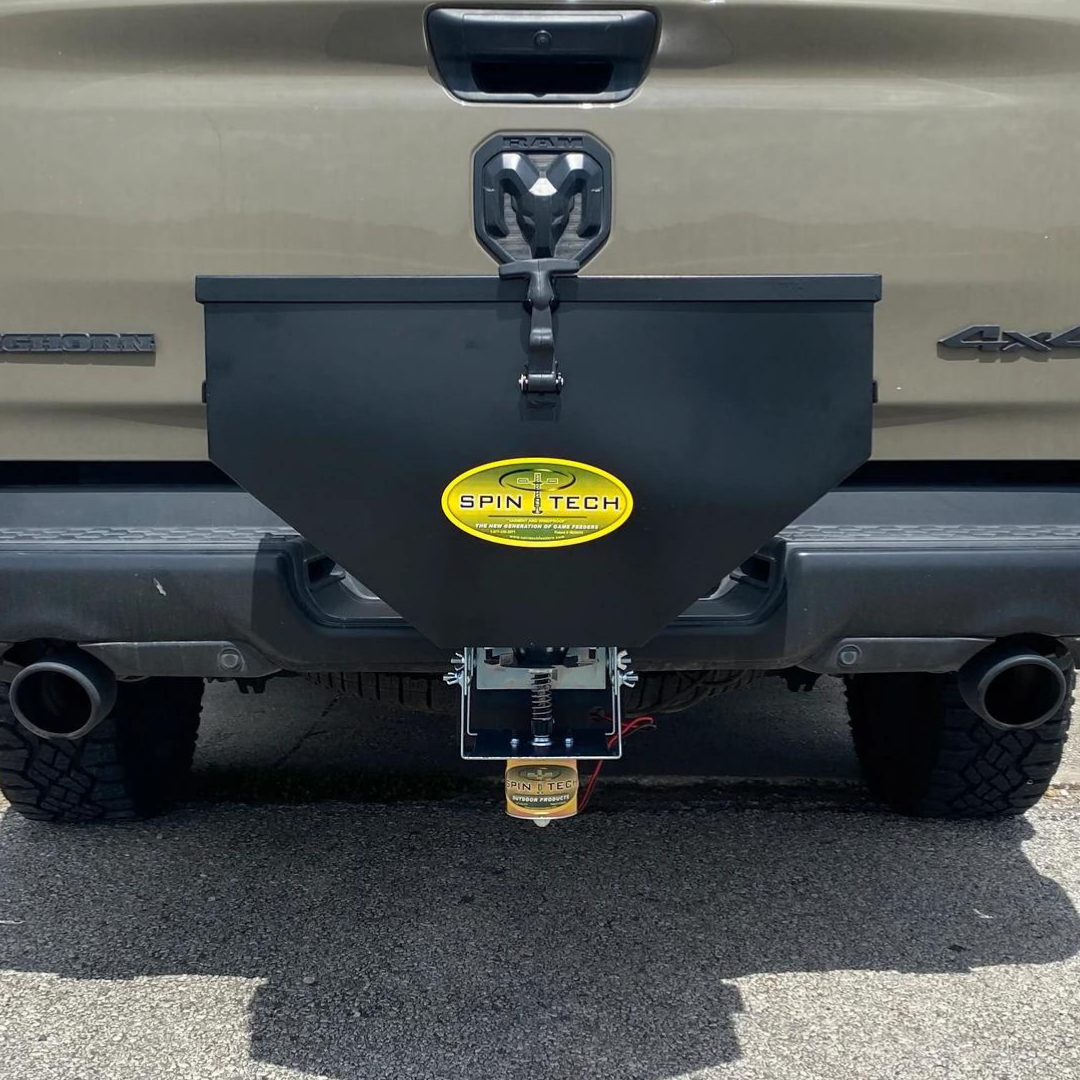
The Inverted SpinTech System mounts the motor above the spinner, providing better road clearance and enhanced motor protection. This guide covers installing individual components, including the Inverted Bundle or replacing just the spinner mechanism if the motor is already installed.
Step-by-Step Installation
Motor Installation
(Skip this section if only replacing the spinner mechanism.)
- Position the Motor Case – The motor comes housed in a plastic case that serves as a positioning bracket.
- Mark the Bolt Holes – The case has four flat mounting legs; place it in position and mark where you need to drill.
- Drill and Secure –
- Drill out the marked holes.
- Insert the included carriage bolts through the square cutouts on the bracket legs.
- Secure with nuts and washers.
Important: Before securing the motor, decide which method you will use to access the set screw during spinner installation in the steps below.
Replacing Only the Spinner Mechanism (Existing Motor Installed)
If you are replacing only the spinner mechanism and leaving your existing motor in place:
- Locate the Set Screw – Your existing spinner is secured to the motor shaft by a set screw.
- Choose Your Method for Accessing the Set Screw:
- If your current downspout already has an access hole: Use a Phillips screwdriver to loosen the set screw.
- If there is no access hole: You may need to remove the motor temporarily or drill a small access hole in the downspout (see Method 1 below).
- Loosen the Set Screw – Turn the set screw counterclockwise to release the old spinner.
- Remove the Old Spinner – If the spinner is stuck due to moisture and debris, gently pry it loose with pliers or a flathead screwdriver.
- Follow the Spinner Installation Steps Below to install the new mechanism.
Spinner Installation & Set Screw Access
Method 1: Drill a Small Access Hole in the Downspout (Recommended)
- Secure the motor fully in place before moving on to this step
- Insert the spinner mechanism into the downspout first to align the access point.
- Mark the location where the set screw sits.
- Drill a small hole in the downspout at this location.
- This hole will allow a Phillips screwdriver to reach the set screw without causing any material leakage—as long as it is properly positioned.
- Tighten the set screw as tight as possible to ensure a secure connection between the motor shaft and spinner mechanism.
Method 2: Install the Spinner Before Fully Securing the Motor (Alternative)
- Before tightening the motor case bolts, install the spinner onto the motor shaft.
- This allows you to angle the motor slightly to access the set screw.
- However, this method can make it difficult to achieve full torque on the set screw.
- Tighten the set screw as tight as possible to prevent slippage during operation.
✔ Critical Step: Ensure the set screw tightens flush against the flat portion of the motor shaft for a secure fit.
Final Testing
- Reconnect power and run a test cycle to ensure:
✔ The spinner plate opens and rotates smoothly.
✔ The set screw is fully secured.
✔ Feed disperses evenly without leaking.
Cleaning & Maintenance
To keep your Inverted SpinTech Spinner Mechanism performing at its best, regular maintenance is recommended. Over time, corn dust, dirt, and debris can accumulate, potentially preventing the mechanism from operating properly.
How to Clean Your Inverted SpinTech Spinner Mechanism
What You’ll Need:
✔ Water
✔ Dawn Dish Soap
✔ Bucket
✔ Brush or Sponge (A Toothbrush works best!)
✔ Lubricant (Dry lubricant recommended)
Step-by-Step Cleaning Instructions
- 1. Prepare Your Cleaning Solution
- Mix a generous amount of Dawn dish soap with water in a bucket.
- 2. Access the Spinner Mechanism
- If possible, perform this cleaning when the feeder is empty to prevent material from spilling.
- If the feeder is full, see the Cleaning While Full section below.
- 3. Scrub the Mechanism
- Dip your brush or sponge into the soapy water and gently scrub the spinner mechanism, paying close attention to:
- The screw shaft
- The spinner plate
- The motor connection point
- Rotate the spinner plate to expose hidden areas and ensure a thorough clean.
- Dip your brush or sponge into the soapy water and gently scrub the spinner mechanism, paying close attention to:
- 4. Rinse & Dry
- Use clean water to rinse off soap residue and loosened debris.
- Air dry completely or use a cloth to speed up drying.
- 5. Apply Lubricant
- Apply a dry lubricant to the screw shaft and moving parts.
- Avoid heavy oils or greases, as they can attract dust buildup.
- Run a test cycle to ensure smooth operation.
Cleaning While the Feeder is Full
If you need to clean the mechanism while the feeder is full:
✔ Take a small hand towel and gently push it into the funnel that extends from the hopper where the spinner plate sits.
✔ Be sure not to push it too far—just enough to block material flow while still allowing access to the mechanism.
✔ This trick is useful anytime you need to service your control system.
Inverted Spinner Mechanism Troubleshooting Guide
If your Inverted SpinTech Mechanism isn’t functioning as expected, use this guide to quickly diagnose and resolve common issues.
Spinner Plate Won’t Spin (or Feeder Blows Fuse)
✔ Symptoms: The spinner plate barely moves or appears to tighten instead of dropping when activated. In some cases, the motor may strain and blow a fuse if left running in this state.
✔ Cause: The motor is spinning in the wrong direction, preventing the spinner from moving down the threaded shaft. This is caused by reverse polarity—meaning the positive and negative wires are swapped.
✔ Solution: Reverse the battery connections.
🛠 Fix: Swap the positive and negative wires where they connect to your battery terminals. (If your system is vehicle-powered, this is not possible—contact us for assistance.)
Spinner Plate Works, But Doesn't Seal Shut When Off
✔ Symptoms: Spinner Doesn't seal shut. Feed continues to trickle out even when the motor is off.
✔ Cause: The spinner plate is not sealing shut properly, likely due to lack of compression or corn dust buildup.
✔ Solution: Follow our cleaning instructions. OR if your feeder is older, you may want to shorten the spring to increase tension and sealing capacity. A rubber washer that can be cut and manipulated around the spiral shaft, under the spring works well - You can stack a few of these to get more tension, and life, out of your spring!